

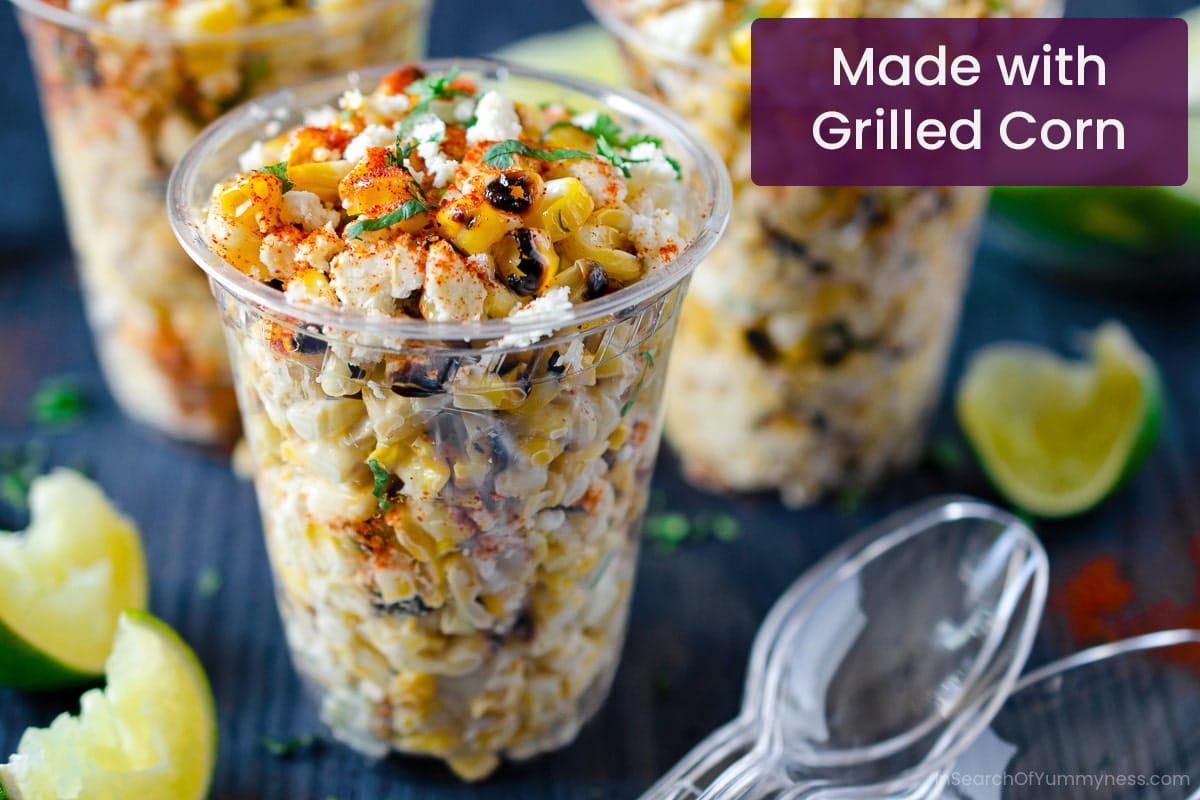
Looking for a fresh, flavour-packed summer snack? These Mexican corn cups, also called esquites or elote en vaso, are creamy, tangy, and loaded with lime, mayonnaise, Cotija cheese, and sweet corn.
Follow my step-by-step instructions to make this recipe with grilled corn for a wonderful charred flavour, or frozen corn for a quick and convenient version that comes together in minutes.
This recipe is great for barbecues, potlucks, or an easy anytime snack.
Save This Recipe
Recipe Highlights
- Servings: Makes 8 (serves about 4-6 people as a side dish)
- Time Commitment: 20-25 minutes for the grilled version, 10-15 minutes if you use frozen corn.
- Effort Required: Easy and quick! Perfect for weeknights or preparing in advance for events.
- Special Equipment: Grill (gas or charcoal), or stovetop and skillet for frozen corn version.
- Dietary Notes: Vegetarian; can be made dairy-free by substituting vegan mayonnaise and omitting cheese.
Jump to:
Why I Make This Dish
There's nothing like fresh grilled corn in the summer: sweet, slightly charred, and perfect with a little salted butter.
One of my favourite ways to enjoy it is in these Mexican-style corn cups. This spoonable, mess-free version is just as satisfying as corn on the cob but with so much more flavour.
I've had esquites a few times over the years, but it was always made the traditional way with boiled corn.
After learning that some street vendors grill the corn before mixing it with crema or mayonnaise, I started making this Mexican corn snack at home with grilled corn for extra flavour.
I use mayonnaise instead of traditional Mexican crema because I could not find crema in my area. Crème fraîche would have been another great option, but I also could not find that my local grocery stores at the time of publishing this recipe.
TIP: You can make your own Mexican crema at home using heavy cream!
Ingredients & Substitutions
- Vegetable Oil: For brushing the grill. Canola or grapeseed oil also works.
- Fresh Corn: Best grilled within a day or two of purchase. Substitute with 3 cups frozen corn (see recipe card note).
- Mayonnaise: Not traditional, but I could not find Mexican crema in my area. Crème fraîche is another good option, but again, it can be difficult to find. The mayonnaise adds creaminess. Mix in sour cream for extra tang, if desired.
- Lime Juice: Adds brightness. Use lime juice for the best flavour; lemon doesn't give the same taste.
- Chili Powder: Adds heat and colour. Use ancho, chipotle, or your favourite blend. Add cayenne for extra spice.
- Salt: Enhances flavour. Omit if using salty Feta.
- Cotija Cheese: Crumbly, mild, and salty. Substitute with Feta.
- Cilantro: For flavour and garnish. Use parsley if preferred, though the taste will differ.
This recipe has not been tested with all possible substitutions or variations. Making changes may alter the taste, texture, or overall outcome. If you try a different ingredient, please share in the comments!
See the recipe card for the complete ingredient list and recipe instructions.
What is Cotija Cheese?
Cotija cheese is a crumbly Mexican cheese made from cow's milk. It's similar to Feta cheese, but it's far less salty and has a milder flavour overall.

I bought my Cotija cheese from a family-owned Mexican grocery store, but I've been told that Whole Foods and Sobeys may have it as well.
If you can't find Cotija, you can use Feta instead, but be sure to add less salt to the recipe (you might not need any).
Tips for Buying Corn on the Cob

- The freshest, sweetest corn usually comes from farm stands, but local grocery store corn is also a good option.
- Corn starts converting sugars into starch right after harvest, so the fresher, the sweeter.
- Look for ears with bright green husks that are tightly wrapped and slightly damp-these are signs of freshness.
- In Canada, partly husked corn in plastic packs is common outside peak summer; it's less fresh than fully husked corn but still works in this recipe.
How to Cut Corn Kernels off the Cob
I like to hold my corn vertically when I cut off the kernels, but if you find this tricky, you can lay the corn down on the board instead.
Just cut off a strip of kernels to create a "flat" side, then lay the flat side down on the board and continue cutting off the kernels in strips all the way around each cob.
There's no wrong or right way. Just do what's easiest for you (and keep your fingers out of the way!).
How to Make Mexican Corn Cups
This recipe isn't difficult to make, but it does take a little time to prep the corn and grill the cobs. If you want to make it faster, scroll down to learn how to make this with frozen corn.
Grill the Corn
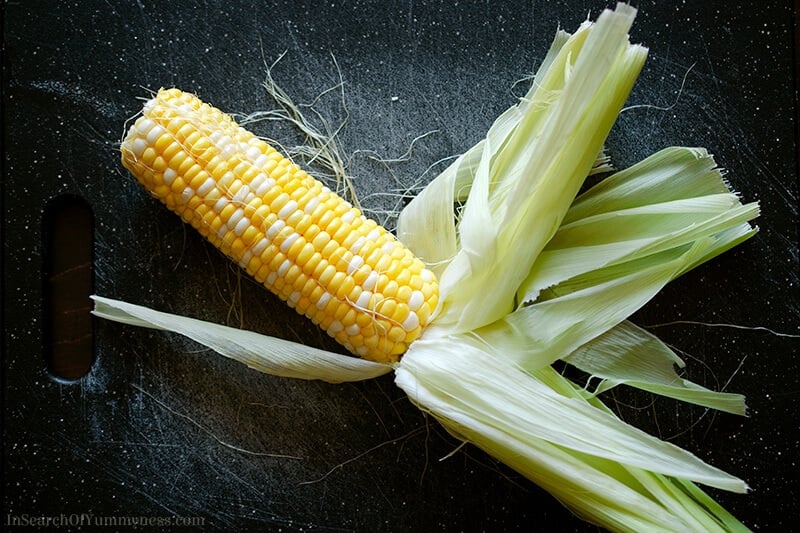
Step 1: Before you start cooking, remove the husks and corn silks from your ears of corn.

Step 2: Grill husked corn cobs for about 10-15 minutes, or until cooked through and slightly charred.
Make the Corn Mixture

Step 3: Allow corn to cool enough to handle, then cut the kernels off of the cobs.

Step 4: In a bowl, combine the mayonnaise, lime juice and chili powder. Then mix in the corn kernels.
Assemble the Corn Cups
To assemble, layer the corn mixture with cheese so each bite gets a bit of everything.
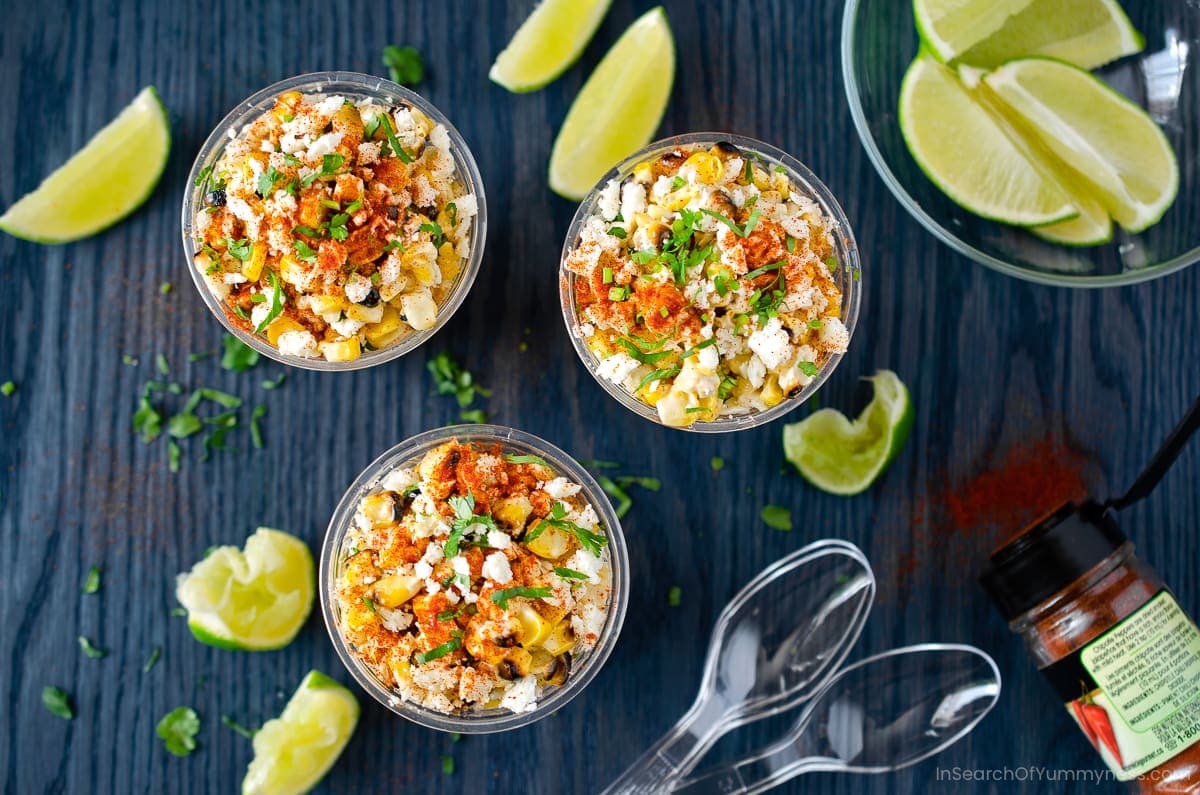
Step 1: Spoon a layer of the corn mayo mixture into small cups.
Step 2: Sprinkle on a layer of cheese, cilantro, and more chili powder.
Step 3: Add another layer of corn and continue layering ingredients until the cups are full. Serve immediately (slightly warm or at room temperature).
If you don't want to serve the corn in cups, you can use small bowls instead.
I like to serve this with lime wedges, because the acidity helps to cut through the richness of the mayonnaise and cheese.
Make Ahead: Grill and cut the corn, then store the kernels in the fridge. Mix the mayo, lime juice, and chili powder separately. Assemble everything just before serving for the best texture.
Tips for Grilling Corn
When it comes to cooking the corn, you have several options. Here are some tips to get you started.
- You can grill corn on a gas or charcoal grill. I like the extra flavour charcoal gives, but either works well.
- Husked corn cooks in about 10 minutes and gives you a charred, chewy texture.
- Corn wrapped in foil or left in the husk takes closer to 20 minutes and turns out tender and juicy. Soak corn with the husks on for about 15 minutes before grilling to help prevent burning.
Need help getting started with charcoal grilling? Check out my charcoal grill guide for beginners.
Time-Saving Tip: Use Frozen Corn!
No fresh corn? No problem.
Frozen corn is an easy way to enjoy these flavourful Mexican corn cups anytime, without having to shuck corn cobs or cut off the kernels.
To Make the Recipe with Frozen Corn:
- Rinse 3 cups of frozen corn under warm water to quickly defrost it. Drain thoroughly.
- Melt 1 tablespoon of butter in a medium skillet over medium-high heat.
- Add the drained corn to the pan. Cook for 5-10 minutes. The corn will be juicier when cooked for less time but will take on tasty browned bits if you leave it in the pan longer.
- Remove from heat and allow to cool. Then add to the mayonnaise mixture and continue with the recipe.
Frequently Asked Questions
Yes! If you don't have a grill, you can use boiled or sautéed corn instead. The recipe includes stovetop instructions for convenience.
You can, but the texture and flavour won't be quite the same. If using canned, drain and rinse well, then sauté in a bit of butter or oil to bring out more flavour.
You can serve them either way, however, I have found that if the corn is too hot, the mayonnaise will separate and become greasy. I prefer to enjoy the corn at room temperature or cold.
Mexican corn cups are one of my favourite snack recipes. I hope you'll try them at your next BBQ or picnic.
If you end up making this dish, let me know how it turned out in the comments below!
Recipe Card

Mexican Corn Cups (Esquites)
Ingredients
- 1 teaspoon vegetable oil, for brushing the grill (or canola)
- 4 ears corn, husked (or 3 cups of frozen corn, see note)
- ¼ cup mayonnaise, or Mexican crema
- 2 teaspoons lime juice, plus extra lime wedges for serving, if desired
- 1 teaspoon chili powder, plus extra for sprinkling (use ancho, chipotle, or your favourite mix)
- salt, to taste (omit if using Feta cheese)
- ½ cup Cotija cheese, crumbled (substitute with Feta)
- 1 tablespoon cilantro, finely chopped for garnish (or parsley)
Equipment
- Charcoal or Propane Grill
Instructions
- Preheat your grill to medium-high heat.
- Brush grill grates with oil using a heat-proof barbecue brush or a folded coffee filter dipped into oil.
- Grill corn, turning every few minutes, for 10-15 minutes or until the ears are cooked through and are slightly charred. Remove cooked corn from grill and set aside to cool down enough to handle.
- Meanwhile, in a medium bowl, combine the mayonnaise, lime juice and chili powder. Set aside.
- Stand an ear of corn up lengthwise on a cutting board (flat end down), and hold it from the top with your non-dominant hand. Carefully, use a large kitchen knife to cut the kernels of corn off of the cob, and place into a large mixing bowl. Repeat with all ears of corn.
- Combine the corn with the mayonnaise mixture, and season with salt as desired.
- Spoon a layer of the corn mayo mixture into small cups. Sprinkle a layer of cheese, cilantro (optional), and more chili powder (if desired), then add another layer of corn and continue layering ingredients until the cups are full.
- Serve immediately (slightly warm or room temperature) with lime wedges. Refrigerate unused portions promptly. Leftovers will last about 1-2 days in the fridge.
Save This Recipe
Notes
- Use fresh corn for the best flavour, ideally grilled within a day or two of purchase.
- If fresh isn't available, substitute with 3 cups frozen corn (thawed and cooked). See instructions below.
- Brush the grill with vegetable oil to prevent sticking.
- For juicier corn, grill with husks on or wrapped in foil for 16-20 minutes after soaking husks in water for 15 minutes. For chewy charred corn, grill without husks or foil.
- Rinse 3 cups of frozen corn under warm water to quickly defrost it. Drain thoroughly.
- Melt 1 tablespoon of butter in a medium skillet over medium-high heat.
- Add the drained corn to the pan. Cook for 5-10 minutes. The corn will be juicier when cooked for less time, but will take on tasty browned bits if you leave it in the pan longer.
- Remove from heat and allow to cool. Then add to the mayonnaise mixture and continue with the recipe.
Please read the full blog post for all of my tips, variations, and recommendations for this recipe.
Nutrition
Nutritional information is an estimate and will vary depending on specific ingredients and brands used. Accuracy cannot be guaranteed.
Private Notes
Have you made this recipe?
Let us know how it turned out in the comments!This blog post was originally published in July 2019. It has since been updated with new information.
About Shareba
Shareba Abdul is a recipe developer and food photographer with a Culinary Arts certificate from George Brown College and 15+ years of experience creating and testing recipes for home cooks. All recipes are tested in her home kitchen. Learn more →

Shareba Abdul says
Nope. That is incorrect. Actual Mexican crema is not sour cream and lime juice. It's SIMILAR to sour cream, but it is not the same thing. Don't believe me? Here's a blog post, written by a Mexican food blogger: https://www.isabeleats.com/mexican-crema/.
Christine says
Is this corn served cold or warm? Just wondering because of the mayonnaise.
Shareba says
Hi Christine, I usually serve this at room temperature. I let the grilled corn cool down so I can cut it off the cob, and by the time I'm done preparing it it's barely warm. Some people do serve it hot, but I find that the mayonnaise gets greasy that way. I have also tried it cold, and I don't think it tastes as good, personally. I hope that helps!
Alicia Ibarra says
So yummy, I have been asked to make it for our church fundraiser! 🥰
Alicia Ibarra
Denver, CO
Shareba says
I hope everyone loves it! Good luck with the fundraiser!
Keira Ball says
Perfect for a party.
Shareba says
True!