

Interested in trying charcoal grilling, but not sure where to start?
This guide to charcoal grilling for beginners will walk you through everything you need to know: from lighting the coals to cooking your first meal.
Jump to:
- Why Choose Charcoal Grilling?
- Equipment
- What's the Difference Between Lump Charcoal and Briquettes?
- How to Light a Charcoal Grill
- Understanding Direct vs. Indirect Heat
- Three Heat Zone Options
- The Single-Zone Fire (Beginner Friendly)
- Beginner Tips for Charcoal Grilling Success
- Important Safety Tips
- Charcoal Grilling Recipes
- Common Questions
Why Choose Charcoal Grilling?
While gas grills are convenient, charcoal grilling gives food that deep, smoky BBQ flavour that just feels like summer.
Yes, it takes a bit more time and effort, but the results are worth it.
Charcoal grilling also gives you more control over temperature and heat zones, which means better searing and more flexibility in how you cook.
Equipment
You don't need a lot to start charcoal grilling, but a few basic tools make the process much easier and safer:

- Charcoal: lump or briquettes
- Charcoal Chimney Starter: a metal cylinder used to light charcoal
- Charcoal Grill: kettle or portable style
- Fire Starters: newspaper, wax cubes, or wood bundles
- Barbecue Lighter: choose one with a long metal wand
- Grill Gloves: for safe coal handling
- Long Grill Tongs: get two: one for raw meat, one for cooked meat
- Basting Brush: silicone or pastry-style
- Spatula/Turner: sturdy and long-handled for safely handling food
- Instant-Read Thermometer: essential for food safety, especially when cooking chicken
- Charcoal Rake or Long Tongs: for arranging coals
- Grill Cleaning Tool: wooden scraper or coil brush (not wire)
What's the Difference Between Lump Charcoal and Briquettes?
There are two main types of charcoal to choose from: natural hardwood lump charcoal and charcoal briquettes.

Both are made from wood, which is heated in an oxygen-poor environment until it turns into the high-carbon product that we know as charcoal.
However, there are some key differences between the two types.
Hardwood Lump Charcoal

- Made from natural hardwood with no additives
- Burns hotter and cleaner with less ash
- Irregular shapes make it trickier to pack into a chimney
- Best for quick, hot grilling and ceramic grills
Example: Maple Leaf Lump Charcoal (available at Canadian Tire)
Charcoal Briquettes

- Made from compressed charcoal and binders like starch
- Uniform size and shape for even, long burns
- Slower to light but ideal for low-and-slow cooking
- Avoid briquettes pre-soaked in lighter fluid
Example: Weber Briquettes (available at Home Depot)
Some grilling purists might turn up their noses at charcoal briquettes, but they do have their perks, especially if you're new to grilling.
Briquettes are uniform in size and shape, which makes them easier to stack and manage.
They burn at a steady rate and maintain consistent heat, which is ideal for foods that need longer, slower cooking.
Kingsford is a well-known brand, but I prefer Weber Briquettes. They're made from hardwood char fines and bound with vegetable starch (no weird chemicals or fillers).
To learn more about the different types of charcoal, you can check out this article about charcoal by Bon Appetit.

Avoid any briquettes that are pre-soaked with lighter fluid. These can give your food an unpleasant chemical taste.
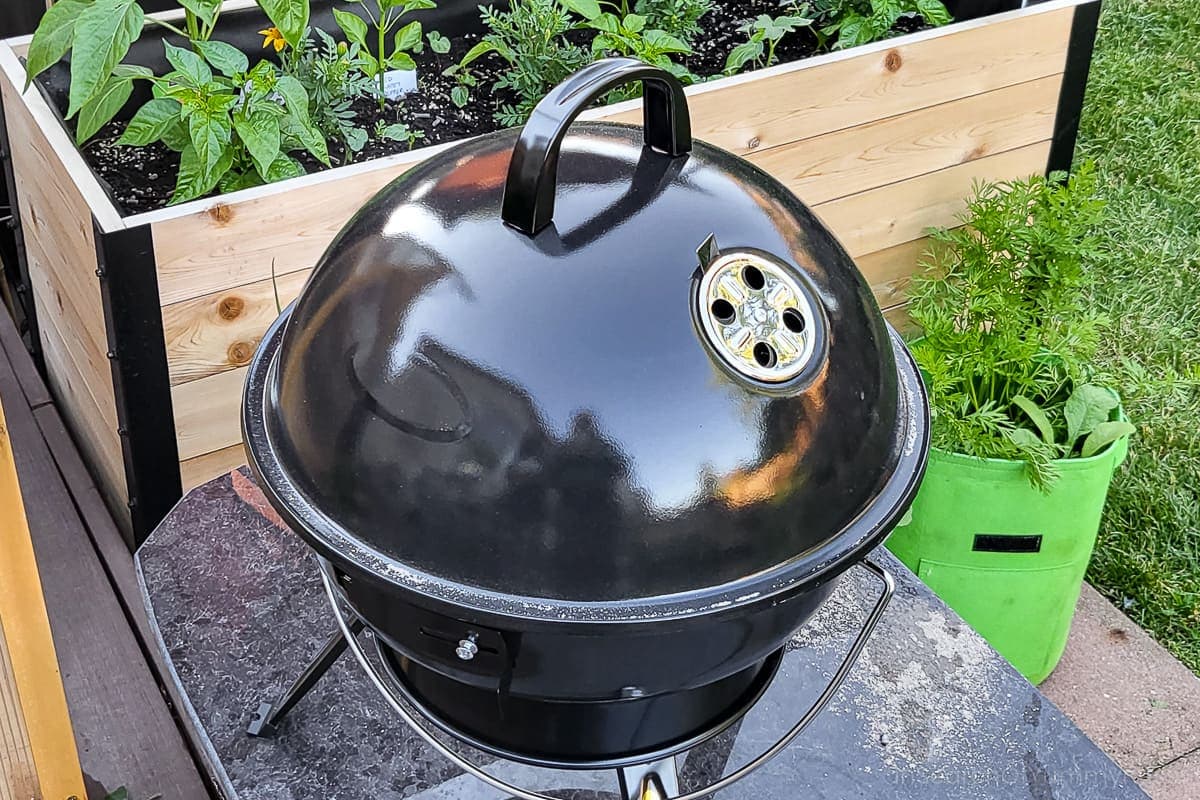
How to Light a Charcoal Grill
Using a chimney starter is the easiest and safest way to get your coals hot.
A charcoal chimney is a metal cylinder with a handle that has small holes throughout it for ventilation and a wire rack inside.
Most of the big grilling brands have a good chimney starter in their product line-up. Be careful with inexpensive ones, though; they can have very sharp edges.
Firestarter Options
You can use crumpled newspaper to light your chimney, or opt for wax fire starters like cubes, squares, or wood ribbons coated in wax.
I never use lighter fluid. It leaves behind a chemical taste that can ruin the flavour of your food.

I like using Xtraflame firestarters. They're Canadian-made, non-toxic, and made from recycled wax and wood fibres. One square is usually enough to get the whole chimney going.
They're available at Walmart, Canadian Tire, or online.
Step-by-Step Instructions
Step 1: Prep the Chimney

- Open the grill vents
- Remove the cooking grate (the top grate)
- Stuff crumpled newspaper or a wax cube under the chimney
- Fill the chimney ¾ full with charcoal for quick cooks, or fill it completely for longer sessions
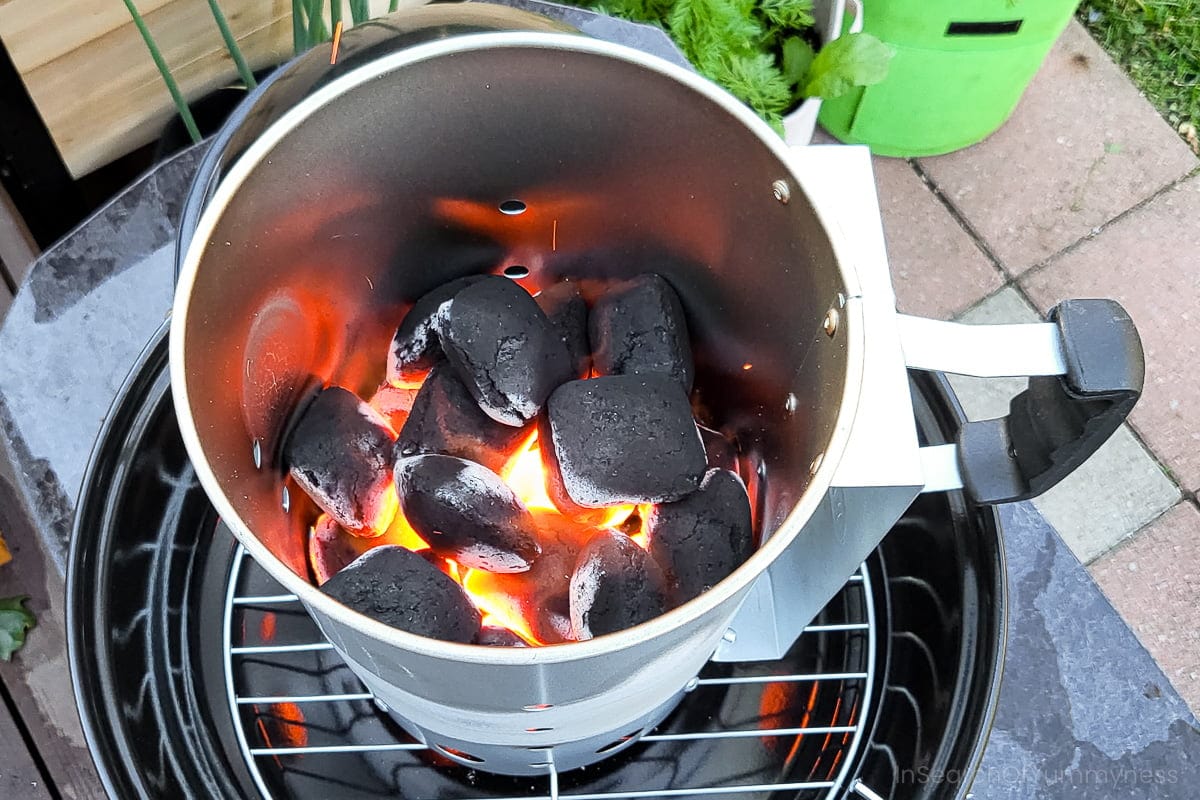
Step 2: Ignite the Coals

- Place a fire starter on the charcoal grate (the bottom grate)
- Light the fire starter using a long lighter
- Place the filled charcoal chimney over the fire starter
- Allow the coals to burn for about 15-20 minutes, until they're glowing and coated in a layer of ash.
Step 3: Pour and Arrange the Coals

- Wearing grill gloves, pour the hot coals onto the charcoal grate
- Use tongs or a grill glove to replace the cooking grate
- Put the lid on the grill (with the vents open) and allow it to heat up for 10-15 minutes.
Safety Tip!
Pour the hot charcoal away from your body and keep your face away from the grill. Once emptied, place the chimney in a safe spot, out of reach of kids and pets.
Step 4: Clean the Grill Grates
If your grill is brand new, there's nothing to scrape yet. But once you've cooked a few meals, food residue will start to build up.
Let the grill get nice and hot, then use a wooden scraper or a stainless steel coil brush to clean the grates. Avoid wire brushes as they can shed bristles.
After cleaning, close the lid and let the grill come back up to temperature before cooking.
To learn more, Napoleon has a helpful article on how to clean grilling grates.
Understanding Direct vs. Indirect Heat
There are two methods of grilling, whether it's on a gas or charcoal grill, that everyone needs to know about.
The first is grilling over direct heat, and the second is grilling over indirect heat.
Mastering heat zones is one of the most important skills in charcoal grilling. It's how you control cooking speed and avoid burning or undercooking your food.
What is Direct Heat?
Direct heat means cooking your food right over the hot coals. It's fast, intense, and perfect for:
- Hot dogs
- Sausages
- Steaks
- Shrimp
- Quick-cooking veggies (like asparagus)
For example, a 1-inch-thick T-bone steak will cook in about 6-8 minutes using direct heat.
What is Indirect Heat?
Indirect heat is when you cook food away from the coals. There's no charcoal directly under the food, so it cooks more gently, like a convection oven. This method is great for:
- Larger cuts of meat (like whole chickens)
- Dense vegetables (like potatoes or squash)
- Anything that takes more than 20 minutes to cook
Often, you'll start food over direct heat for searing, then finish over indirect heat for even cooking without burning.
Three Heat Zone Options
Heat zones refer to different areas of your grill that have varying levels of heat.
By arranging your charcoal in specific ways, you can create direct heat zones (high heat, right over the coals) and indirect heat zones (lower heat, away from the coals).
The Single-Zone Fire (Beginner Friendly)
This setup gives you direct heat across the whole grill, ideal for a fast cook or searing steaks or burgers.
- You can create a single-zone fire by spreading hot charcoal evenly across the entire charcoal grate.
The Two-Zone Fire (Beginner Friendly)

The most common setup for charcoal grilling is the two-zone fire:
- Pile charcoal on one side of the grill, using a charcoal rake or long tongs to spread it evenly. This will be your direct heat zone.
- Leave the other side empty. This will be your indirect heat zone.
- Replace the cooking grate and preheat the grill with the lid on for about 10 minutes.
This setup gives you the flexibility to sear over high heat, then move your food to the cooler side to finish cooking. It's also helpful if you get flare-ups; just shift the food to the indirect side.
💡 Pro Tip: Position your grill's top vent over the indirect-heat side to draw airflow across the food and prevent hot spots.
The Three-Zone Fire (Advanced Option)
If your grill is large enough, you can set up a three-zone fire:
- Charcoal on both sides of the grill
- An empty space in the centre
This gives you two direct heat zones and one indirect heat zone in the middle, which helps manage temperature while cooking multiple items at once.
Beginner Tips for Charcoal Grilling Success
Charcoal grilling takes a bit of practice, but a few simple habits can make a big difference.
Keep the Lid On

Every time you lift the lid, you let out heat. Keep the lid closed as much as possible to maintain a consistent temperature.
Oil the Food or the Grate

Brushing oil on your food helps prevent sticking. If you prefer oiling the grates, use a coffee filter dipped in high-smoke-point oil (like canola) held with long tongs.
Use a Thermometer
Don't guess: check internal temperatures to make sure your food is cooked through. It's especially important for chicken and thicker cuts of meat.
Practice with Easy Recipes
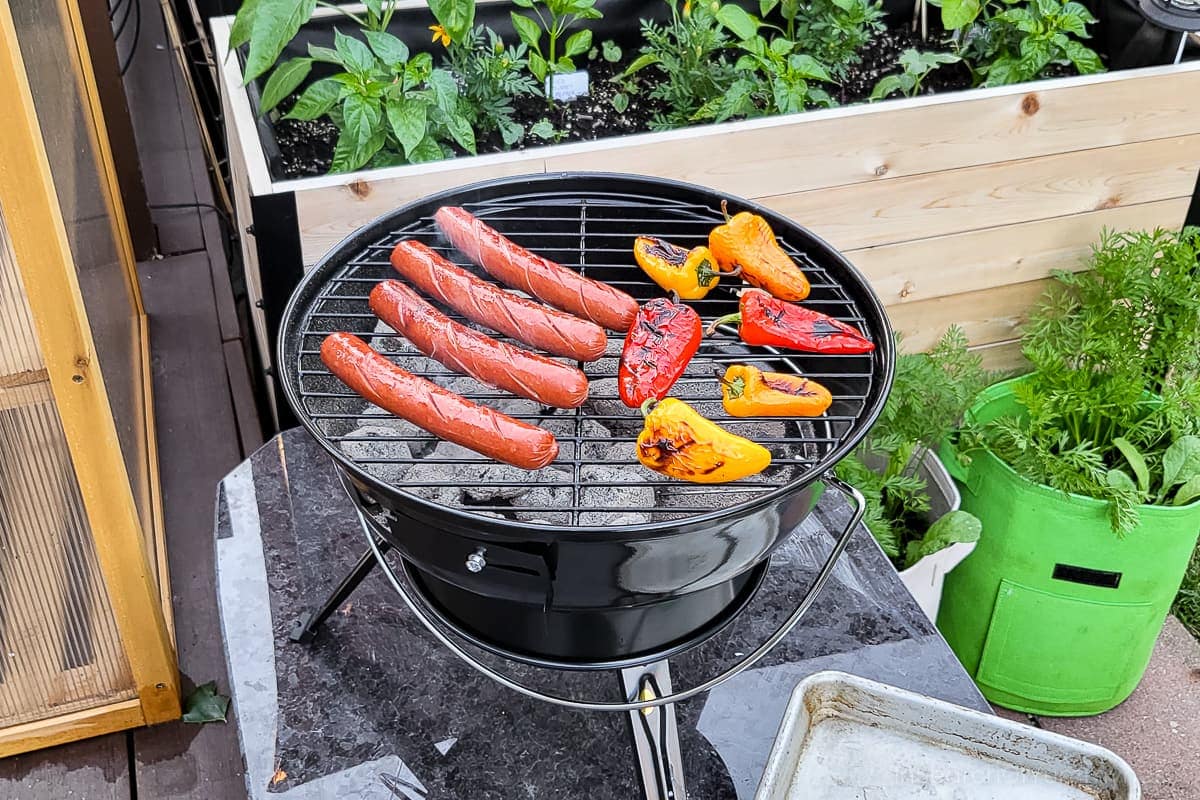
Start with simple foods like hot dogs, sausages, or veggies. You'll get used to cooking times and temperature control without the stress of big-ticket ingredients.
How to Put Out Charcoal Safely
After grilling, it's important to handle leftover charcoal safely to prevent accidental fires or damage.
- Close all vents and put the lid on.
- Let the coals cool for at least 48 hours before throwing them out.
- For faster cooling, transfer hot coals to a metal bucket of water (never pour water on your grill!)
- Once cooled, wrap spent charcoal and ashes in foil and place in a non-combustible trash can.
Important Safety Tips

- Never grill indoors or in enclosed spaces! Charcoal produces carbon monoxide when burned, which is odourless and deadly.
- Keep the grill away from your house or other structures to reduce the risk of fire.
- Don't grill on apartment balconies unless specifically allowed.
- Never leave a hot grill unattended, especially if there are children or pets nearby.
- Avoid grilling in windy conditions. Sparks from the charcoal can blow around and ignite dry grass, leaves, etc.
- Never pour lighter fluid on lit coals.
- Don't spray water on a flare-up. Move the food to an indirect heat zone instead.
- Learn how to put out a grease fire. Never try to put out grease fires with water. Use baking soda instead.
- Don't pour water on your charcoal to put it out. This can damage your grill and create hot steam (which can burn you).
- Always follow the manufacturer's safety instructions for your specific grill.
- Skip wire brushes to clean your grill; they can be hazardous.
Learn more about fire safety tips for BBQ season from the Government of Canada.
Charcoal Grilling Recipes
I like to grill vegetables over coals because it gives them a great smoky flavour. Tomatoes and eggplants are particularly yummy when grilled over coals, but sometimes I'll grill up some corn to make my Mexican corn cups, too.
Here are a few charcoal grilling recipes for beginners that you might like to try:
Common Questions
It depends on what you're cooking. For a quick grill like hot dogs or burgers, fill your chimney about ¾ full. For longer cooks or larger meals, use a full chimney.
About 15-20 minutes, until the coals are white-hot and covered in ash.
Leave the lid open for searing, then place the burgers over indirect heat to finish cooking evenly with the lid down.
Yes! Save any unburned pieces and mix them with fresh charcoal next time. You can learn more in this article from Cooks Illustrated about reusing charcoal.
Charcoal grilling might seem intimidating, but it's a rewarding way to cook once you get the hang of it. Stick with the basics, give yourself time to learn, and enjoy the delicious results.
If you have any questions (or helpful tips), please share them in the comments below!
This guide to charcoal grilling for beginners was originally published on June 29, 2019. It has since been completely rewritten and re-published with new information and photographs.
About Shareba
Shareba Abdul is a recipe developer and food photographer with a Culinary Arts certificate from George Brown College and 15+ years of experience creating and testing recipes for home cooks. She is also a member of the International Association for Culinary Professionals. All recipes on this website are tested in her home kitchen. Learn more →

mike says
Thanks for sharing! I've just bought a portable charcoal grill and I'm eager to try it.
Pit Brothers BBQ says
Thanks for sharing such a informative content. We will include these points to our list.
Afton Jackson says
Your tip about how to use indirect and direct heat for different kinds of meat was definitely the most helpful to read. Now that my home has an open enough lawn to be able to hold barbecue parties in, I wanted to get some tips on how to start. Knowing the uses for indirect and direct heat really helped because I previously just assumed you would treat every type of meat the same and put them on top of the fire directly. I'll be sure to remember that after I start shopping for grills to start barbecuing on.
Nathaniel Lee says
Great guide for charcoal grilling. This is a big help! Thanks 🙂
Shareba says
I'm glad you found it helpful 🙂
Calvin says
Awesome guide for beginners like me in charcoal grilling
Shareba says
Thanks Calvin, I'm glad you found it helpful!